


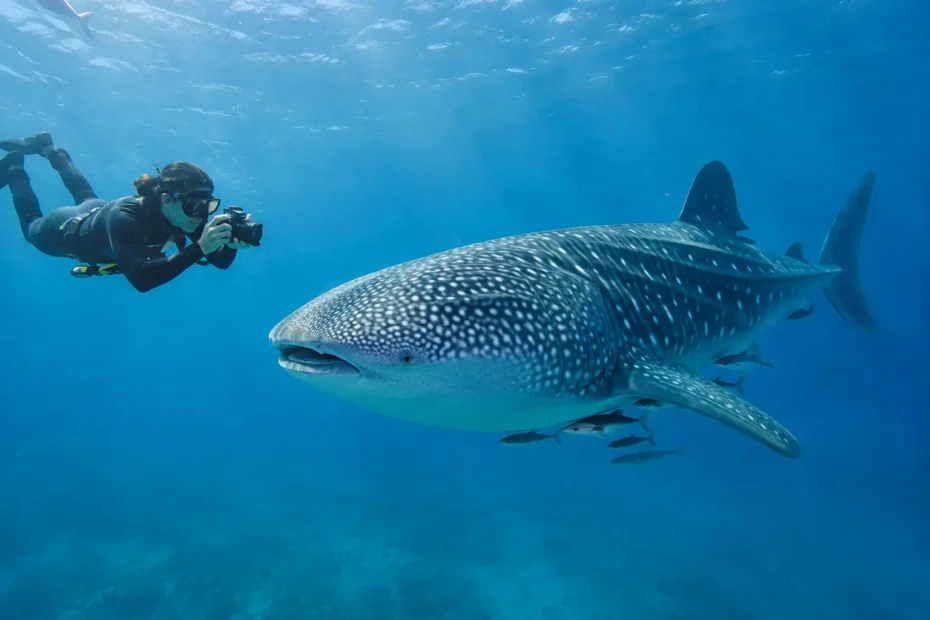
The moment a whale shark rises out of blue water, most photographers make the same mistake: they rush. It is understandable. You are suddenly swimming beside the biggest fish on Earth, its white constellation of spots moving quietly past you. But learning how to photograph whale sharks starts with slowing down. A calm approach produces better images, protects the animal, and makes the whole encounter far more enjoyable.
In the Sea of Cortez, whale shark encounters are often snorkeling experiences rather than scuba dives. That changes how you prepare, how you expose your images, and how you move in the water. The goal is not to chase a perfect frame. It is to be ready when the shark naturally gives you one.
Prepare Your Camera Before You Enter the Water
There is no time for menu hunting once you are in the water. Set up your camera on the boat, confirm the housing seal is clean, and make a few test shots before departure. Saltwater is unforgiving of a forgotten O-ring, a weak battery, or a fogged port.
A compact camera, action camera, mirrorless body, or DSLR can all create memorable whale shark photographs. The bigger difference is your comfort with the system. A camera you understand well will outperform an expensive setup that distracts you from the animal.
For most travelers, a wide-angle lens is the best choice. Whale sharks are enormous, and a wide field of view lets you include the full body or place the shark in its blue-water environment. On an interchangeable-lens camera, a fisheye or wide zoom works beautifully. With an action camera, choose the widest natural-looking setting available and avoid digital zoom.
Start with a shutter speed of at least 1/250 second. If the shark is moving quickly or sunlight is strong, 1/500 is safer. Use continuous autofocus with subject tracking if your camera handles it reliably, or pre-focus at a moderate distance and keep your body position steady. An aperture around f/5.6 to f/8 generally offers enough depth of field for a large animal moving toward or across the frame.
Auto ISO can be useful in changing light, but set a reasonable maximum if your camera permits it. Underwater noise becomes obvious in shadowy blue water. If you prefer manual exposure, check the histogram between encounters rather than relying only on the screen, which can look brighter in tropical sunshine than the image really is.
How to Photograph Whale Sharks in Natural Light
Natural light is usually your best friend with whale sharks. Their size and the open-water setting make strobes less useful than many visitors expect. A strobe may only illuminate floating particles between you and the shark, especially when visibility is not perfect. It can also add unnecessary equipment, drag, and stress while you are trying to swim smoothly.
Aim to photograph when the sun is reasonably high, then keep the light behind you or slightly over your shoulder. This brings out the shark’s pattern and gives the water a richer blue. If you shoot directly into the sun, expose for the shark rather than the bright surface, unless you deliberately want a dramatic silhouette.
The best angle is usually slightly ahead of the shark, never directly in its path. Let it travel through the frame. A side profile shows its impressive length, while a gentle three-quarter angle toward the camera adds a sense of connection. If the shark approaches naturally, stay calm, hold your position, and let it pass. A close encounter is more powerful when it looks unforced because it was.
Do not fill every frame with the entire animal. Photograph the broad head, the pattern along the back, the small eye, a remora riding alongside, or a snorkeler at a respectful distance for scale. These details tell the story of the encounter. They also give you variety when editing later.
Move Like a Guest, Not a Pursuer
The most important setting is not on your camera. It is your pace in the water.
Whale sharks are wild animals feeding, traveling, and conserving energy. A fast swim toward them may cause them to change direction or dive. It also exhausts photographers quickly, which leads to sloppy kicking, heavy breathing, and poor buoyancy. Enter the water quietly, orient yourself, and swim in a parallel line only when your guide says it is appropriate.
Keep a respectful distance and follow the rules set by local authorities and your boat crew. Regulations can change by location and season, but the principle does not: never touch, ride, block, feed, or crowd a whale shark. Give it room to choose its own route. If it turns away, the encounter is over. Let it go with the same respect you brought to it.
Avoid diving down in front of a shark to force a head-on image. Aside from being disruptive, this often creates a less convincing photograph. Your image should show a relaxed animal in open water, not an animal trying to avoid a human.
For families and first-time snorkelers, this measured approach is especially valuable. You do not need to be a competitive swimmer to take a meaningful photograph. Good flotation, a properly fitted mask, and calm guidance allow you to focus on the moment rather than fighting your gear.
Build a Strong Frame Underwater
Blue water can make even a remarkable subject look flat. Give your whale shark photographs a sense of place by using simple composition deliberately.
Leave space in front of the shark’s direction of travel. This makes the frame feel open and alive. If the animal is swimming from left to right, place it toward the left side of the image and allow blue water ahead. Keep your camera level when possible. A tilted horizon or surface line can make an otherwise beautiful image feel accidental.
Look for clean backgrounds. Boats, fins, bubbles, and other swimmers can quickly turn a peaceful encounter into visual clutter. Sometimes you cannot avoid them, particularly during a busy wildlife season. In that case, change your angle rather than trying to outswim everyone. A slight move downward can place the shark against deep blue water; a move upward may reveal sun rays and a brighter surface.
Watch the tail. It is easy to crop off a tail or dorsal fin when concentrating on the head. Take one wider frame first, then move closer only if the shark remains relaxed and the situation allows. A complete-body shot is often the image people value most, especially when the shark’s spots remain sharp from head to tail.
Small Problems That Can Ruin Good Photos
Fogging is one of the most common frustrations in warm Baja conditions. Keep your camera out of direct sun before entering the water, use moisture-absorbing inserts if your housing accepts them, and avoid opening the housing in humid air. If a lens port begins to fog, do not keep shooting blindly. Return to the boat, dry the housing carefully, and reset.
Backscatter is another issue. It appears as pale dots caused by sunlight or artificial light reflecting off particles in the water. Get closer only within respectful wildlife guidelines, keep the sun behind you, and use natural light rather than a strobe in particle-rich water. You can remove minor backscatter during editing, but prevention is easier.
Color loss is normal underwater. Even near the surface, reds and warm tones fade quickly. Shoot in RAW if your camera offers it, then make gentle adjustments to white balance, contrast, and dehaze afterward. Resist turning the water electric blue or sharpening every spot on the shark. The finest whale shark photographs still look like the ocean, not a poster.
Let the Guide Handle the Logistics
A successful wildlife photo session begins long before the first splash. Conditions, boat positioning, entry timing, other vessels, current, visibility, and local access rules all matter. An experienced captain and guide reads those details so you can conserve energy for the encounter itself.
In La Paz, the right local support also means choosing operators who respect the animals and the regulations designed to protect them. At Sunny Adventure Travel, Bran’s background as a captain and diving instructor helps guests feel prepared whether they arrive with a full underwater camera rig or a simple action camera. The practical details matter: where to stand on the boat, how to enter cleanly, when to keep your camera down, and when the conditions are worth waiting for.
Bring your patience along with your camera. A whale shark does not owe anyone a photograph, and that is exactly why a genuine encounter feels so extraordinary. Explore a private adventure or small-group expedition with Sunny Adventure Travel, and ask us to shape a whale shark day around your experience level, comfort, and the kind of ocean memory you want to bring home.